
Adding page numbers on Windows.
On the Insert tab, select Page Number, and then choose the location and style you want.
If you don't want a page number to appear on the first page, select Different First Page.
If you want numbering to start with 1 on the second page, go to Page Number > Format Page Numbers, and set Start at to 0.
When you're done, select Close Header and Footer or press Esc.
Adding page numbers on macOS.
On the Insert tab, select Page Number, and choose Page Number.
Select a location, and then pick an alignment style. Word automatically numbers every page, except designated title pages.
To change the numbering style, select Format on the top toolbar and choose the formatting you want to use.
Select OK twice to close both dialog boxes.
Click HERE for a video tutorial.
Setting Normal Margins
MLA, APA, and Chicago style guides require 1-inch margins on the top, bottom and both sides of the page. In most cases, when you open Microsoft Word, the margins will already be set to 1-inch. To be sure you have the margins set to 1-inch:

Changing Margins
Select the margin configuration you want, or select Custom Margins to define your own margins.
Click HERE for a video tutorial.
Add a Cover Page on Windows
On the Insert tab, in the Pages group, click Cover Page.
Click a cover page layout from the gallery of options.

After you insert a cover page, you can replace the sample text with your own text by clicking to select an area of the cover page, such as the title, and typing your text.
Add a Cover Page on macOS
On the Insert tab, click Cover Page.
Click a cover page layout from the gallery of options.

After you insert a cover page, you can replace the sample text with your own text by clicking to select an area of the cover page, such as the title, and typing your text.
Portrait Orientation
Portrait is the name for the vertical page orientation. This page orientation is what most essays, documents, and assignments require.
Landscape Orientation
Landscape is the name for the horizontal page orientation. This page orientation is more often used for brochures and other similar documents.

Changing Page Orientation for the Whole Document
To change the orientation of the whole document, select Layout > Orientation.
Choose Portrait or Landscape.
Changing Part of the Document
Select the content that you want on a landscape page.
Go to Layout, and open the Page Setup dialog box.
Select Landscape, and in the Apply to box, choose Selected text.
Click HERE for a video tutorial.
Footnotes and endnotes are one of the important ways to correctly cite sources used in a paper. Footnotes appear at the bottom of the page, and endnotes come at the end of the document. A number or symbol on the footnote or endnote matches up with a reference mark in the document.
Adding Footnotes & Endnotes
Click or tap within your document content where you want to reference a footnote or endnote.
On the References tab, select Insert Footnote or Insert Endnote
Note the newly created footnote, at the bottom of the current page or endnote, at the end of the document.
Enter what you want in the footnote or endnote.
To return to editing, double-click the reference mark at the beginning of the note in the document.

Click HERE for a video tutorial.
Create a Table
1. Open a blank Word document
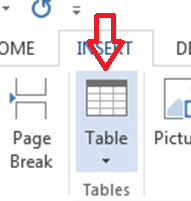
2. In the top ribbon, press Insert

3. Click on the Table button
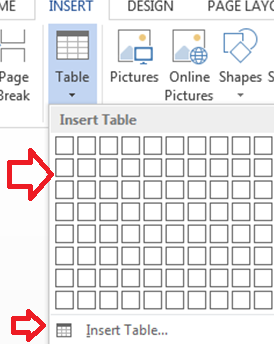
4. Either use the diagram to select the number of columns and rows you need, or click Insert Table and a dialog box will appear where you can specify the number of columns and rows.
5. The blank table will now appear on the page. Adjust it as necessary. Standard features like bold, italics, and underline are still available! These items may be helpful for creating headings or calling out certain items in the table.
Click HERE for a video tutorial.
Insert an Image
To insert an image into your document, choose one of the following:
Select Insert > Pictures > This Device for a picture on your PC.
Select Insert > Pictures > Stock Images for high quality images or backgrounds.
Select Insert > Pictures > Online Pictures for a picture on the web.
Select the picture you want, and then select Insert.
Resize or Move an Image
To resize a picture, select the picture and drag a corner handle.
To wrap text around a picture, select the picture, and then select a wrapping option.
To move a picture, choose an option that is not the in-line with text option.
Click HERE for a video tutorial.
Adding Captions
Select the object (table, equation, figure, or another object) that you want to add a caption to.
On the References tab, in the Captions group, click Insert Caption.

3. In the Label list, select the label that best describes the object, such as a figure or equation. If the list doesn't provide the label you want, click New Label, type the new label in the Label box, and then click OK.

4. Type any text, including punctuation, that you want to appear after the label.

5. Click OK.
Adding Captions Automatically
Word can add captions automatically as you insert tables, images, or other objects.
Select the object (table, equation, figure, or another object) that you want to add a caption to.
On the References tab, in the Captions group, click Insert Caption.
On the Captions dialog box, click AutoCaption, and then select the check boxes for the items that you want Word to automatically add captions to. You can also choose which position to add captions to in the Position drop-down list.
Modifying Captions
Once you've added at least one caption to your document you should see a new style displayed on the style gallery called "Caption". To change the formatting of your captions throughout your document simply right-click that style on the gallery and choose Modify. You can set font size, color, type and other options that will apply to your captions.
In Word and Outlook, you can use accent marks (or diacritical marks) in a document, such as an acute accent, cedilla, circumflex, diaeresis or umlaut, grave accent, or tilde.
For keyboard shortcuts in which you press two or more keys simultaneously, the keys to press are separated by a plus sign (+) in the tables. For example, to type a copyright symbol © , hold down the Alt key and type 0169.
For keyboard shortcuts in which you press one key immediately followed by another key, the keys to press are separated by a comma (,). For example, for è you would press Ctrl + ` , release and then type e.
To type a lowercase character by using a key combination that includes the SHIFT key, hold down the CTRL+SHIFT+symbol keys simultaneously, and then release them before you type the letter. For example, to type a ô, hold down CTRL, SHIFT and ^, release and type o.
For the full list of keyboard shortcuts click HERE.
There are three areas in Microsoft Office where you may want to change the language.
Editing or Authoring is the language in which you write and edit your content. You may need to install an associated keyboard for this language via Windows settings.
Proofing tools are spelling and grammar check. Typically, you'll set this language to be the same as the editing or authoring language.
Display language is for all the buttons, menus, and controls in Office.
You can set the display and editing or authoring languages independently from each other. For example, you may want the display language to be English, but the document you're writing or editing is in French.
Adding a Display Language
To add a display language:
Open an Office program, such as Word.
Select File > Options > Language.
Under Office display language, on the Set the Office Language Preferences, select Install additional display languages from Office.com.
Choose the desired language in the Add an authoring language dialog and then select Add. A browser page opens where you can download the installation file.
On the browser page, select Download and run the downloaded pack to complete installation.
The added language appears in the list of Office display languages.
Adding an Authoring Language
To add an authoring language:
Open an Office program, such as Word.
Select File >Options >Language.
On the Set the Office Language Preferences, under Office authoring languages and proofing, select Add a Language....
Choose the desired language in the Add an authoring language dialog and then select Add. A browser page opens where you can download the installation file.
On the browser page, select Download and run the downloaded pack to complete installation.
The added language appears in the list of Office authoring languages.
Adding Proofing Tools
Adding a Display Language
User Interface - The display language for Office for Mac uses the primary language set for operating system. To change the display language for Office for Mac, you need to set a different primary language for your operating system:
On the Apple menu, choose System Preferences > Language & Region
In the Preferred Languages list, set the desired language to be your primary language by dragging it to the top of the list.
If the language you want doesn't appear just press the + sign and add it.
You'll have to restart your Office application for this change to take effect.
Adding an Authoring Language
Adding Proofing Tools
Tip: To prevent having to manually configure the proofing language with each new document in Word, switch on the option to detect the language you're writing. On the Review tab, go to Language, and then select Detect language automatically.